
The Steiner P4Xi riflescope is a high-quality optic that can be used for a variety of purposes, from hunting to tactical shooting. In this guide, we will answer some of the most common questions about the P4Xi, as well as provide product reviews and useful tips. If you are considering purchasing a Steiner P4Xi riflescope, then this guide is for you!
Table of Contents
Steiner P4Xi Rifle Scope Overview
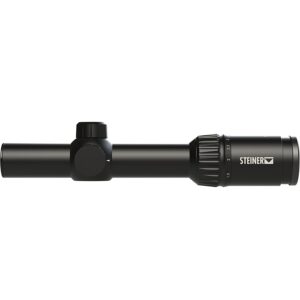 The Steiner P4Xi is a versatile and reliable scope that is perfect for any situation. With a magnification of 1x-4x, this scope provides instant versatility for close-quarters or mid to long-range shots.
 Steiner P4Xi Riflescope User Manual
Pros & Cons of Steiner P4Xi Riflescope
Overall, the P4Xi is an excellent scope that should be on the top of your list if you’re in the market for a new riflescope. It has everything you need and then some. If you’re looking for the best of the best, then look no further than the Steiner P4Xi.The Buyer’s Guide
Steiner P4Xi Riflescope First Impressions
The P series from Steiner is a line of high-quality optics that has been around for quite some time. The P4Xi is the newest addition to this lineup and it does not disappoint. This scope is packed with features and is sure to please even the most demanding shooter.
The first thing you’ll notice about the P4Xi is the large 56mm objective lens. This allows for an incredible amount of light gathering, which is perfect for those low-light situations. The image quality is superb and the clarity is second to none.

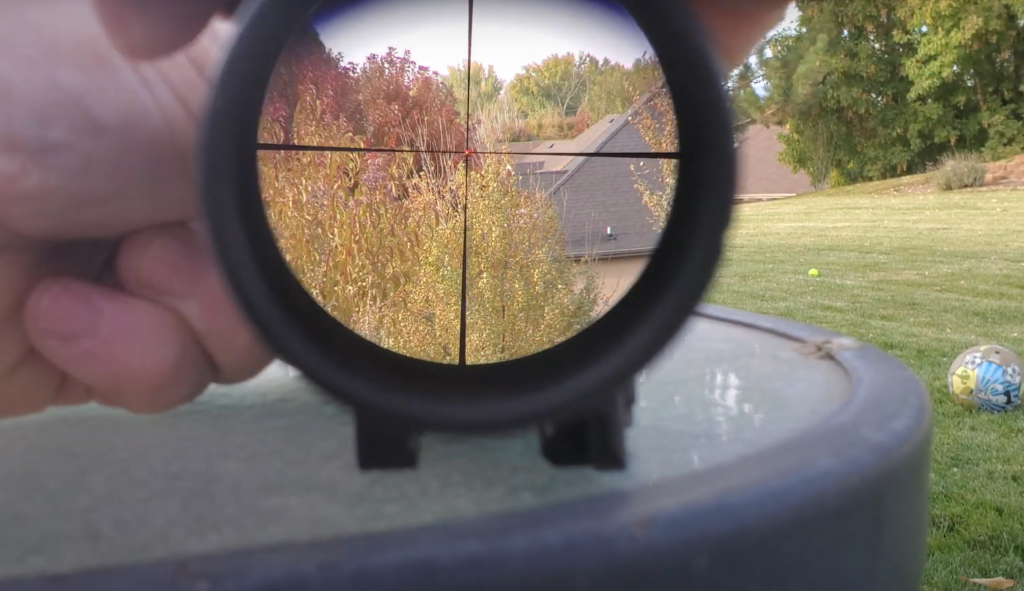
The reticle is also worth mentioning. The P4Xi comes with P3TR illuminated reticle, which is perfect for those who like to shoot at long range. The reticle is also very easy to see in all lighting conditions.
Now that you know a little bit about the P4Xi, let’s take a closer look at some of its features.
Steiner P4Xi Riflescope Features
Design
The P series scopes from Steiner have always been known for their rugged and durable construction, and the P4Xi is no different. It’s designed to withstand the recoil of even the most powerful rifles, making it a great choice for hunters who want a scope that will stand up to anything they throw at it.
One of the best features of the P4Xi is its compact design. It’s shorter than many of the other scopes on the market, making it a great choice for hunters who need a scope that won’t weigh them down. [4]
4X Zoom
The P4Xi comes with a four-time zoom, which is great for long-range shots. You can get up to 600 yards with this scope, making it perfect for hunters and target shooters alike. With such a powerful zoom, you’ll be able to make those challenging shots with ease.
Consistent Eye Relief
One of the main concerns for many shooters is whether or not they will have enough eye relief with a certain riflescope. This is especially important for those who wear glasses, as they need to be able to position their eye in such a way that the entire image is visible through the glass. With the Steiner P42Xi, you will not have to worry about this problem. This scope is designed with a constant eye relief of four inches, meaning that no matter where you position your eye, you will always be able to see the entire image. This is a great feature for those who wear glasses or who shoot with both eyes open.
Low Profile Turrets / Illumination Controls
The P-Series from Steiner has long been synonymous with tactical precision, and the new P-Series scopes continue that tradition. The updated features on the P-Series scopes make them even more versatile and user-friendly than before, while still maintaining that legendary Steiner optical quality. In this guide, we’ll take a look at the new features on the P-Series scopes, and how they can help you take your shooting to the next level.
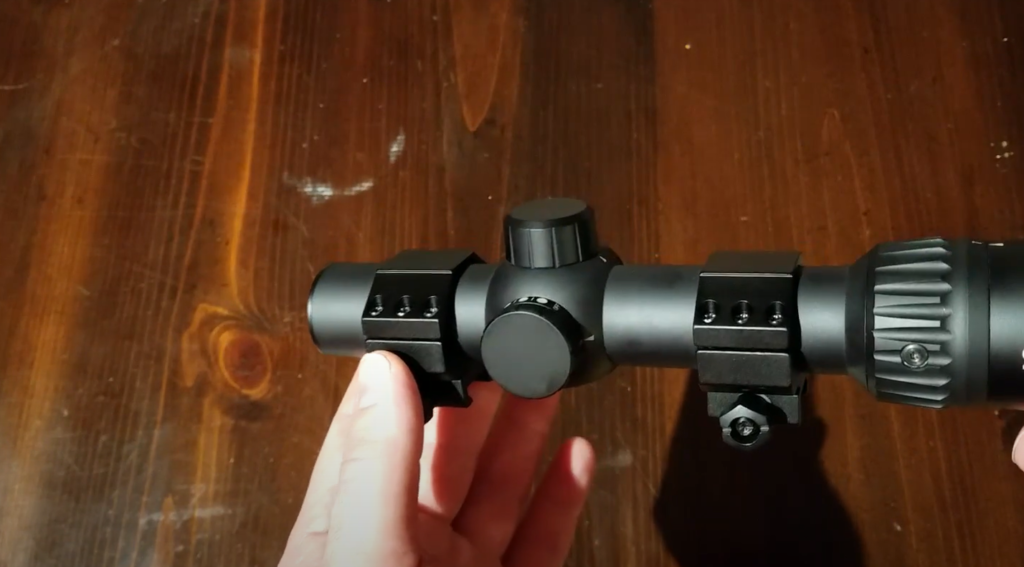
One of the most noticeable changes on the new P-Series scopes is the low profile turrets. The turrets have been redesigned for easier adjustments in the field, and they’re now more resistant to impact and vibration. The turrets are also now capped, to prevent them from being accidentally knocked out of adjustment.
The P-Series scopes also feature an updated illumination control.
The illumination can be set to auto-off, so you don’t have to worry about accidentally leaving it on and draining the battery.The P3TR Reticle
The PTR reticle is a three dot reticle that is designed for rapid target acquisition. The three dots represent the ballistic trajectory of the round at 25, 50, and 100 yards. This makes it quick and easy to range your target and make an accurate shot.
Waterproof/ Fogproof /Shockproof
All Steiner rifle scopes are waterproof, fogproof, and shockproof. This means that you can use them in any weather conditions without worrying about damage to the scope. The P series is also nitrogen-filled, which prevents internal fogging of the lenses.
The G1 Reticle
The G¹ Reticle is the first of its kind. It was designed specifically for long-range target engagement and provides a number of features that make it ideal for this purpose. The most notable feature is the hashmark spacing, which is calibrated to be one MOA apart at 100 yards. This makes it easy to estimate range and make corrections for windage and elevation.
Illuminated Reticle
One of the main selling points of the Steiner P4Xi is the illuminated reticle. This feature allows you to see your target more clearly, even in low light conditions. There are three different brightness settings to choose from, so you can adjust it to fit your needs. The downside of an illuminated reticle is that it can be distracting, so make sure you’re not looking at it when you don’t need to.
One Piece 30MM Tube
The P4Xi series from Steiner represents the latest and greatest in terms of optical technology. The one piece 30mm tube provides a larger field of view than traditional scopes, as well as increased light transmission. This results in a clearer image, even in low light conditions.
Manual for Steiner P4Xi Riflescope
Mounting The Scope
Most P&S scopes come with a set of mounting rings. For the P series, we recommend the use of 30mm tube adapters. You will need to purchase these separately if they are not included in your package. The adapters make it possible to use a variety of Weaver and Picatinny rail-mounted accessories. There is a wide variety of these available on the market, so finding one to suit your needs should not be difficult.
Once you have the appropriate adapters, mounting the scope is a relatively simple process. First, you will need to remove the factory-installed bases and rings. This can be done with a small Allen wrench or screwdriver. Next, attach the adapters to the scope using the screws that come with them.
Finally, mount the scope on your chosen rail system and tighten the rings or clamps securely.Eyepiece Focusing
To focus the P-series riflescope, look through the scope at a well-lit, outdoor scene or a blank wall indoors. Slowly turn the eyepiece focus knob until the image is clear and sharp. Once you have found the point of optimal clarity, leave the setting there and do not readjust it again, except in rare cases where changing environmental conditions (e.g., temperature, humidity) might warrant a slight adjustment.
Windage/ Elevation Adjustment
To adjust for elevation, locate the turret on the top of the scope. There is a small knob on the turret that you will need to unscrew. Once it is unscrewed, you can begin to make your adjustments. Each click on the turret represents one MOA (minute of angle).
To make adjustments for windage, locate the knob on the side of the scope. Just like with elevation, each click on this knob represents one MOA. Adjustments can be made in both directions.
It is important to note that you should only make adjustments when your rifle is unloaded and the safety is on. Before you make any adjustments, it is always a good idea to take a few practice shots to get a feel for where your point of impact will be. Once you have made your adjustments, be sure to screw the turret knob back in so that it does not accidentally get moved.
Setting The Zero Stop
The next thing you need to do is set the zero stop. To do this, you will need to remove the turret cap and loosen the three screws that hold the elevation turret in place. Once you have done this, you can rotate the turret until it stops at your zero position. Once you have done this, you can retighten the screws and replace the turret cap.
Parallax / Focus Adjustment
To adjust for parallax, you’ll need to locate the parallax adjustment knob on the left side of the scope. Once you’ve found it, simply turn it until the image in the scope is clear.
To focus the reticle, you’ll need to look through the scope and turn the magnification ring until the crosshairs are sharp. Once they’re in focus, you can use the windage and elevation adjustments to fine-tune the position of the reticle.
Illuminated Reticle Adjustment
To adjust the reticle, simply turn the knob on the side of the scope. You’ll see a small red dot in the center of the scope. This is the aiming point. To move the reticle, simply turn the knob until the red dot is in the desired position.
Replacing The Battery
The Steiner P4Xi Riflescope uses a CR2032 battery to power the unit. [2]
To replace the battery, open the battery compartment cover on the underside of the scope. Remove the old battery and insert a new one, making sure that the positive side is facing up. Close the cover and screw it tight to secure it in place.
Care And Maintenance
It is important to keep your riflescope clean and well-maintained. Here are some tips on how to do that:
- To clean the lenses, use a soft, dry cloth. If there are stubborn stains, you can use lens cleaning fluid and a microfiber cloth.
- Avoid using paper towels or regular cloths, as these can scratch the lenses.
- Do not use compressed air to blow dust off the lenses.
- Keep the riflescope stored in a cool, dry place.
- If you will be storing it for an extended period of time, make sure to remove the batteries.
Tips And Considerations
Here some things to consider before you use a Steiner P4xi Riflescope:
- Read the instruction manual that comes with your purchase
- Be aware of your target and what is beyond it
- Practice shooting in different light conditions
- If you are a beginner, get help from a more experienced shooter
- Be sure to clean and maintain your riflescope regularly
FAQ
How do you clean Steiner binoculars?
To clean your Steiner binoculars, you will need only a soft and clean cloth. You should never use any type of cleaning solution or solvent on your lenses. Simply wipe them down with the cloth until they are free of smudges and dirt. If you need to remove something sticky, like tree sap, you can use light soap on a cotton swab. Just be sure to not get any cleaner on the actual lenses.
Can you use glasses cleaner on binoculars?
You should never use a glass cleaner or any kind of cleaning solution on your binoculars. The chemicals in these solutions can damage the lenses and coatings. Instead, you should use a soft, clean cloth to wipe away any fingerprints or smudges.
What is a Subtension on a reticle?
A subtension is an estimation of measurement. For example, on the Mil Dot reticle, each dot represents amil (milliradian). By knowing the size of your target, you can use the mil dots to estimate range. This is especially useful for long-range shooting. Most scopes will have either MOA or MIL reticles, and some even have both. MOA (minute of angle) is generally more popular in the US while MIL (milliradian) is more popular in Europe.
What is the advantage of an illuminated reticle scope?
An illuminated reticle scope is a sight that uses an electronically controlled light source built into the scope to illuminate the crosshairs or reticle. This feature is useful in low-light conditions, such as dawn or dusk, when the game is most active. It can also be used to help distinguish between the color of the animal and its surroundings.
Are illuminated reticles legal for hunting in California?
The answer is yes, but only for certain types of game animals. For example, you can use an illuminated reticle when hunting deer, but not when hunting turkey.
Check with your local game warden for more information.
What is a capped turret scope?
A capped turret scope is a type of riflescope that has the adjustment turrets covered with a protective cap. This prevents the accidental movement of the windage and elevation adjustments. Capped turret scopes are typically more rugged and durable than uncapped turret scopes, making them ideal for hunting and tactical applications.
Can you put a turret on any scope?
The answer is yes. Ballistic turrets are available as an upgrade for many models.
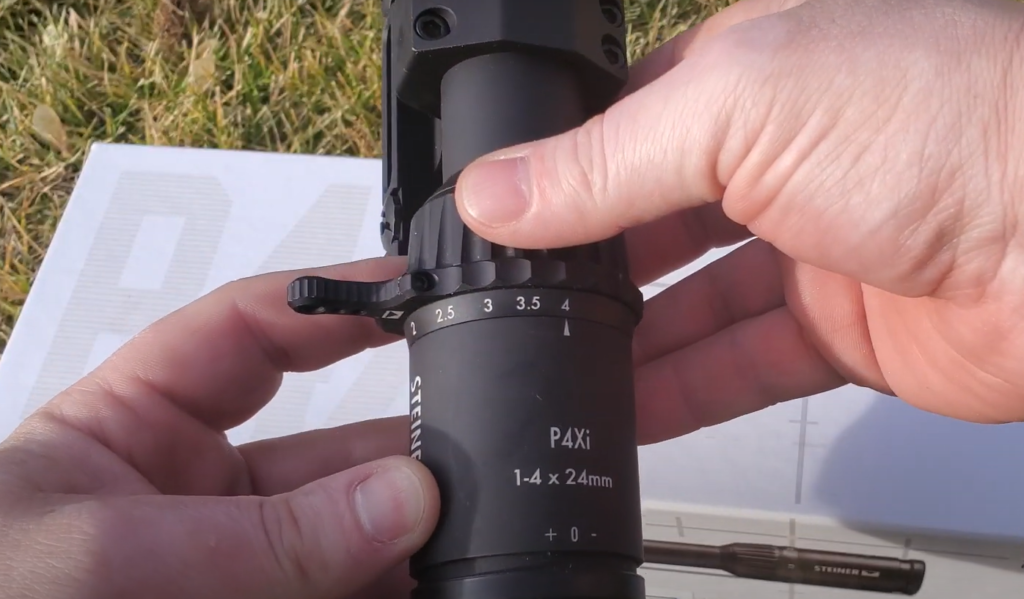
Does it come with a throw lever?
Yes, it comes with a throw lever. The Steiner P-series has a patented throw lever that is integrated into the power ring. This makes for fast and easy magnification changes.
Related Video: Steiner P4Xi 1-4x Rifle Scope Review
Conclusions
The Steiner P42Xi is a top-tier riflescope that offers a lot of features for the price. It’s packed with all the bells and whistles that you’d expect from a high-end scope, yet it’s still relatively affordable. If you’re in the market for a new scope, the P42Xi should definitely be at the top of your list.
We hope you enjoyed our Steiner P42Xi Riflescope guide.
Thank you for reading!
References:
- https://www.amazon.com/Steiner-5201-P3TR-Riflescope-1x-4x24mm/dp/B01MDLW8A3
- https://thegunzone.com/steiner-p4xi-1-4×24/
- http://www.nitevis.com/Steiner_P4Xi_1-4×24.htm
- https://www.marineapproved.com/best-scope-for-300-blackout-review/#5_Steiner_5201_P3TR_P4Xi